Editor's Pick
Gallery


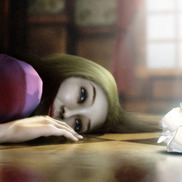
I started this project a long long time ago and have worked on it on and off. Ihave no idea how long I ever actually spent on it but probably way too long. It’s always been my experimental piece so a lot of the stuff on here I hadn’t tried before at the time. It took me down some rabbit holes between not having a strong enough computer to complete the sculpt at one point, obsessing over color detail from all angles thinking about maybe a 3D print or animated poster which lead to wanting to attempt a real hair sim (which ended up being a deep deep rabbit hole, but I settled on a sculpt with a little paint over in the final image here). I decided I finally wanted to wrap up this project so I spent a week wrapping it up and putting together renders for this composite.
The models were started in Maya and finished in Zbrush. Textures were started in Photoshop and finished in Zbrush and Cinema 4D Body Paint and are all hand painted. Final renders we created in Maya Mental Ray and composites in Photoshop. The only minor airbrushing is applied to the hair and feathers, and a couple small composite mask bleeds around the rock.
▼ Images
-
Gatcha-Z Editor's Pick
I was working on this character during the beta of zbrush 3, but I didn't end up to anything good...
I wanted to do a second try and it went better! I didnt't expect to take so much time indeed...
I wanted to do some king of modern version of the Gatchaman character.The low res mesh were done in max, sculpted/ textured/ composited in zbrush.
A bit of photoshoping to add a subtil glow, tweak a bit the levels.Here's the non textured version straight out from zbrush
http://sebleg.free.fr/2007/grey%20compo%20copy.jpg
17272 Views
-
cilantro Editor's Pick
Cilantro is a friend of mine, she is a Thai woman and makes this soup that has Cilantro in it. It inspires so much flavor and the herbs she uses just made me start painting this.
Most of my pieces are made for the viewer to see the meaning that they conjure up. Some have a definate meaning but I never try to interpret it as I find it more interesting to see what others think, get thier take.
With most commisions, I can paint a rough in less than 2 hours and a final detailed 2.35 Acedemy 35mm sized or HD in less than 6 hours.
Mainly Natural Media Airbrush, Photoshop and a little Painter, dry scan and retouch with pqainter and photoshop.
Trying to get more into Film Concept Art. Would appreciate any advice or reccomendations
Thanks,
KD Mathesonhttp://www.kdmatheson.com14027 Views
-
-
Dawn,The Dinotaur Editor's Pick
It was roughly 10 months since I decided to sit back and study anatomy..and that slowly lead to my first ever original character design.There were some long breaks in between and I didnt really start on the modeling until the December of 2006.
Modeling done with max and mudbox.Textured and composited in Photoshop.
My inspiration was Artwork by Kolby Jukes,Blizzard and Aaron St Goddard.
More images:
A turntable of the body : http://sriramatrix.3dnitz.com/misc/Greekotaurpreview.WMV
I hope you guys like it;Comments are welcome
Thank You :)20027 Views
-
Newington Butts Editor's Pick
Hi Everybody,
The image came straight from 3ds max and mental ray.
Photoshop was then employed for the sole purpose of fitting the 3d render onto the Photographs.
The image is part of a number of views produced with a purpose of aiding the architects with their planning application.
The view is verified, which means it was chosen by the local authorities. Furthermore we (GMJ Design Ltd) had employed surveyors to accurately pick the camera points; we then mathematically translated & matched them accurately into 3D.
When rendering with the Max9/Mental Ray for photomontages, it becomes a bit more of a challenge as it is quite fiddly to load photographs of environments which have buildings on, in the background when using the Daylight system for mental ray.
Since we were keen to have the mr Suns highlights reflected onto the materials, the following was done:
For the reflections, photographs of the environment were loaded onto the refraction section of all reflective objects.
Next, the colour of the sky from mr daylight system was matched with the sky of the photograph.
Note that this process will enable us to have both the daylight systems sky colour/suns disk intensity and the photograph reflecting onto the scene.
The render took about an hour and thirty minutes.
Thanks
Jamie
18856 Views
-
the end Editor's Pick
this is the end of this incredible world...under attack from the sky..21663 Views
-
one world extinguish Editor's Pick
hello , this is my last one, my son is trying to save this word underattack...24559 Views
-
Wood & Stock Editor's Pick
The Wood & Stock 2D create by Angeli from Brazil. I adapt it's to 3d.12042 Views
-
Lancaster Bomber Editor's Pick
This is a frame from one of approximately 30 CG shots I created for the film "Ironbird". It is set in World War 2, and follows the crew of a Lancaster Bomber. The action takes place on a night-time raid. The model was constructed from plans, and textured using Maya and Photoshop. Due to time constraints, I had to develop a streamlined pipeline approach to creating the numerous external shots of the airborne battle. The scene consists of various background elements: an animated ground plane, several layers of Maya fluid clouds, a background 360 dome matte, and various sprite based 2d elements for foreground interaction, such as animated clouds of flack explosions, and 2d clouds on cards for camera pass-bys. This meant that I could just animate the motion of the plane (It is stationary, and the ground /clouds move past it) and freely point the camera basically anywhere, and it would look correct. This allowed me to focus on the Acting of the sequences, rather than lengthy environment setups. The scene was then sent off to the render farm, which produced the resulting passes for me to composite and colour grade for the final output. The Bomber Crew was modelled and textured by Anthony Carrierro. I was also responsible for creating other assets for the film. See my website and showreel for further info on this project.
14757 Views
-
Heavy Artillery Tank Model Editor's Pick
Heavy Artillery Tank Model, created in 3Ds Max and textured in Photoshop. I wanted to capture the essence of a beaten up, hardworking desert vehicle. Had a lot of fun texturing this one. The model was comped into a quick 2D scene and colour corrected using photoshop. I intend to create a proper desert environment for an animation with this model. Comments Welcome. See my website for more details on this, such as texture layout / UV samples.
32121 Views
-
Shadow of Time- Media Design School short movie Editor's Pick
This is my final project from Media Design School in Auckland.
More information about project at www.shadowoftime.com
download highrez version (81MB):
http://www.maxarea.com/download/video/sot/SHADOW_OF_TIME_HD.avi
lowrez version (35MB):
http://www.maxarea.com/download/video/sot/SHADOW_OF_TIME_PAL.avi22519 Views
-
KINGDOM OF PENGUINS Editor's Pick
These cute animals are the Emperor Penguins and they arrive at their breeding site by the end of March every year. After that, the male penguin incubates the egg in his brood pouch until mid July, in freezing cold weather of -30C and winds up to 120 km per hour, without eating or hunting. And his is pretty good at it. He never leaves the egg on the ground and never eats. After this 4-month brooding period, male penguin loses half of his body weight and after the female penguin returns, they take turns to take care of the chick. This incident is a great example of the sacrifice and altruism among animals.
Technical explanation about this scene:
I modelled the penguins in Maya, it was opened with Uv map peltingtool and texture was painted with artisan tool in Maya and the fur was made with Maya Fur system. For posing, a bone system was made and 8 different poses were taken. Some poses were subjected to mirroring and thus number of poses increased to 12. I used 13 models with the chick (small penguin). In the main scene, there are about 2450 penguins and 15.000.000 polygons. In its render, ‘Maya mental ray’ and ‘Vue GI’ were used. ‘Pass render’ was taken and I took about 10 different pass renders. I joined them in PhotoShop. Total production process took 3 days. Best regards,13092 Views
-
-
Post nuclear Paris Editor's Pick
This matte painting was made for a contest of a french movie titled le dernier. The biggest challenge was to imagine what would look like the biuldings and houses behind de wrecked ones. The sky is from another photo that i tweacked for the purpuse of the matte
Softwares used: Photoshop,Softimage XSI,Combustion you can have a look at Mattepainting.org to see all reference photos
Here is a link for a camera projection for this matte
http://www.pascalsauvineau.com/Post_nuclear_Paris.avi
18327 Views
-
-
Labyrinth Editor's Pick
This image was done in 2 weeks.
Since I don't work on a 64BIT station yet, I had to render many different passes and do the main finishing work in photoshop.
some screenshots -
http://zivcg.com/temp/l_screen1.jpg
http://zivcg.com/temp/l_screen2.jpg20790 Views
-
Custom Honda Civic Editor's Pick
Custom Honda Civic 1995.
Modeled in Maya 6.5, Photoshop CS2 for texturing, Maya 8.5 (Mental Ray) for rendering
47102 Views
-
Custom Honda Civic Editor's Pick
Custom Honda Civic 1995.
Maya 6.5 for modeling, Photoshop CS2 for texturing, Maya 8.5 (Mental Ray) for rendering.
25689 Views
-
-