
Spider Animations Tutorial
5 Comments
Page 1 of 1
Greetings, I made this spider animations tutorial originally for my blog 'Greenhorn CG' but I wanted to share it to more people so here it is. (I had to do some modification to some of the links and texts so my apology if I made any mistake here)
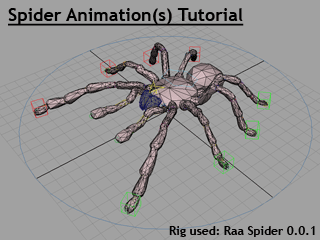
I used Maya (but I will only talk about the concept rather than going into details of which tools to move or rotate stuffs around, which buttons to use or how many time the left button of the mouse is clicked, so this tutorial should apply to any 3D package of your choice) and the rig for this task is this free Raa Spider 0.0.1 rig (it's a rig by user radheshatlar here on CreativeCrash and while this simple rig might not have any advanced control or some fancy settings, it worked very well for this particular article, and I'm thankful for the person created it.
This tutorial will cover 2 different types of spider walk animations, the actual spider walk cycle and my made-up version of an insect walk cycle. Here we go.
Step 0: It's always a good idea to find references for anything you're trying to animate (especially if you're not familiar with movements of the subject of the animation). The reference used for this tutorial is the clip of this sucker spider, but usually the more sources the better.
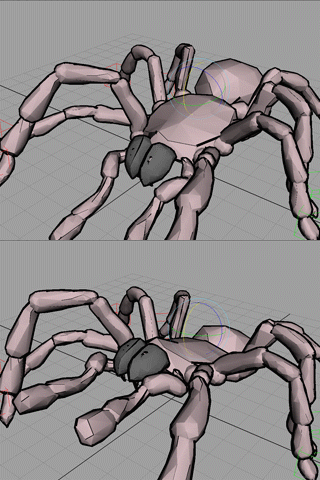
So here we are, simple spider walk cycle + minor secondary animations and offsets. Note that the last step is very important. You should setup the key frames and base animations from step 1-5 efficiently so that you can spend more time and effort finalizing the look of the whole thing. Too bad this rig doesn't have advanced control option for the more complicated animations (especially the tips of the legs) but it worked really fine for the purpose of this tutorial.
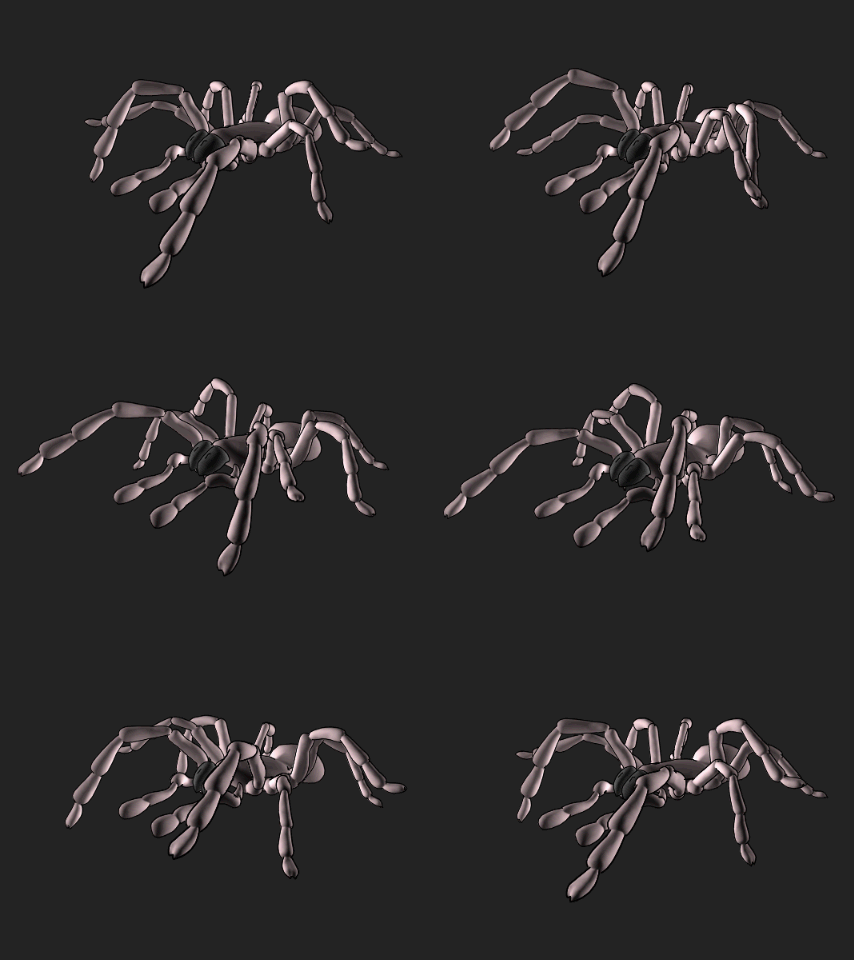
Think I'm going to end this article here, hope I made it easy enough to understand. Critiques and comments are very welcomed. Cheers!

I used Maya (but I will only talk about the concept rather than going into details of which tools to move or rotate stuffs around, which buttons to use or how many time the left button of the mouse is clicked, so this tutorial should apply to any 3D package of your choice) and the rig for this task is this free Raa Spider 0.0.1 rig (it's a rig by user radheshatlar here on CreativeCrash and while this simple rig might not have any advanced control or some fancy settings, it worked very well for this particular article, and I'm thankful for the person created it.
This tutorial will cover 2 different types of spider walk animations, the actual spider walk cycle and my made-up version of an insect walk cycle. Here we go.
1. Actual spider walk
Step 0: It's always a good idea to find references for anything you're trying to animate (especially if you're not familiar with movements of the subject of the animation). The reference used for this tutorial is the clip of this sucker spider, but usually the more sources the better.
Reference clip
Step 1: The first thing to do is to set an interval frame range between each cycle. I used 23 frames (doesn't have to be an even number, odd number only means that the animation curves are not spaced evenly) then set the playback range on the timeline accordingly (so when you play the animation, it will loop even though you haven't make any cycle yet)
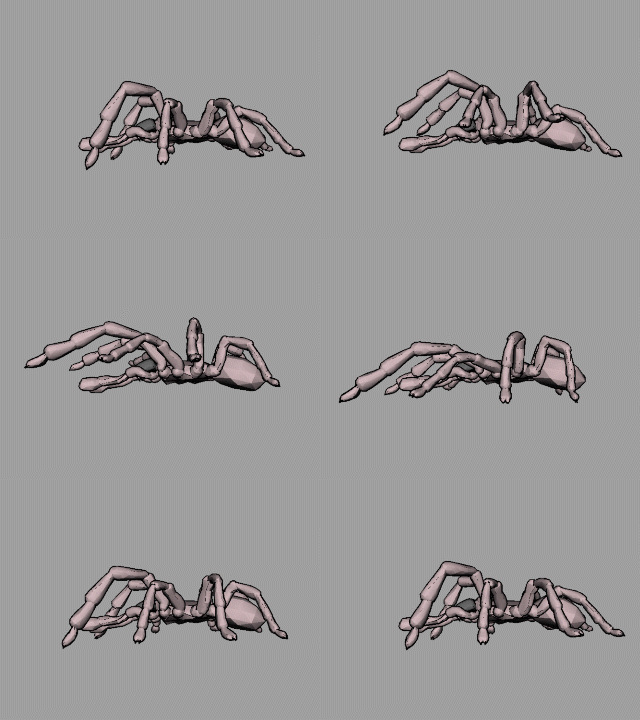
Step 2: Animate the legs to have the same key frames for lifting, mid-air, landing and dragging, it will look obnoxiously ridiculous as we can see from (Image A). I did the 2 legs at the back a little differently. ( from the reference clip it almost looked like they were dragged so I delayed them a little bit, I make them a little higher than I wanted just for clarification)

(Image A) Make a weird looking walk
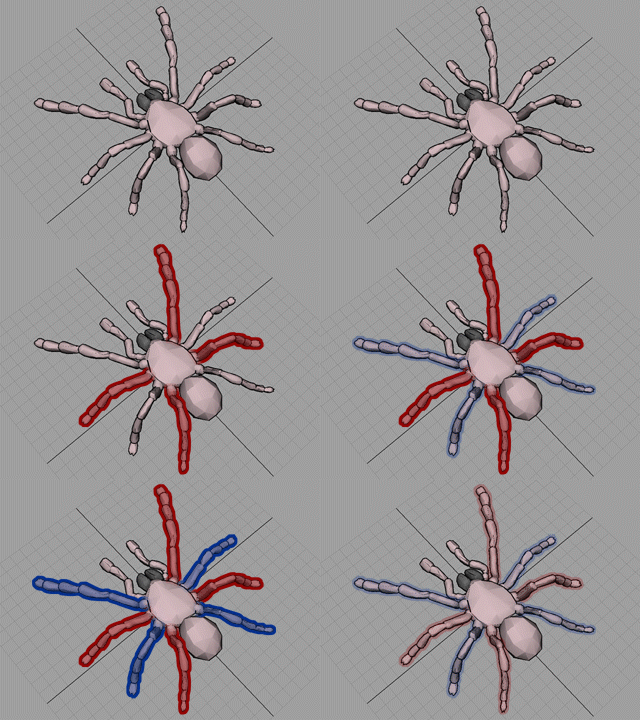
Step 3: Once we've got that stupid looking base for the walk, it's time to determine how to offset the legs to give them the actual 'walking' looks. A spider might have 8 legs but from the reference clip you'll be able to see that this spider kinda moved its legs four at a time (that was the reason I called its move 'mechanical'). Now in (Image B) I separate them into 2 sets of legs color-coded red and blue.
Step 3: Once we've got that stupid looking base for the walk, it's time to determine how to offset the legs to give them the actual 'walking' looks. A spider might have 8 legs but from the reference clip you'll be able to see that this spider kinda moved its legs four at a time (that was the reason I called its move 'mechanical'). Now in (Image B) I separate them into 2 sets of legs color-coded red and blue.

(Image B) Determine movement sets
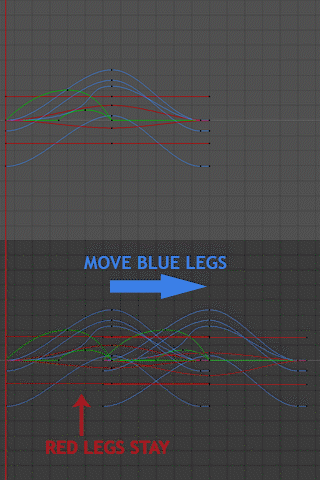
Step 4: After determining 2 sets of legs now it's time to offset the animation of one set of them. In this tutorial the red set will be the leading legs so in this step we're gonna offset the animations of the blue set down the timeline. Just select all the controls for the blues and drag-select the corresponding curves that appeared in the Graph Editor (Animation Editor, F-curve Editor, ..., etc. whatever name for the graph manipulating tool in your program is called) then move them forward down the timeline (Image C) and since my cycle is 23 frames long, I landed the the curves so they start moving at frame 12 (usually halfway, but the key is to make things look good so you can land it anywhere as long as the outcome is satisfying to you)
Step 4: After determining 2 sets of legs now it's time to offset the animation of one set of them. In this tutorial the red set will be the leading legs so in this step we're gonna offset the animations of the blue set down the timeline. Just select all the controls for the blues and drag-select the corresponding curves that appeared in the Graph Editor (Animation Editor, F-curve Editor, ..., etc. whatever name for the graph manipulating tool in your program is called) then move them forward down the timeline (Image C) and since my cycle is 23 frames long, I landed the the curves so they start moving at frame 12 (usually halfway, but the key is to make things look good so you can land it anywhere as long as the outcome is satisfying to you)

(Image C) Offset animations of the blue set of legs
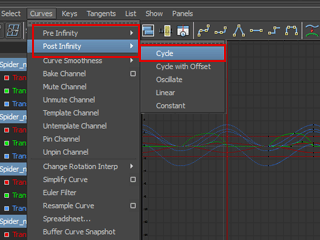
Step 5: Since we've done some offsetting to the blue legs in the previous step, now we have some dead spaces (not the game) before the starting frame of the blue legs (frame 12 in my example) and also the initial playback range (23 frames in this tutorial) couldn't cover all of the animation. Now we're going to apply 'cycles' to the animation curves so we can expand the playback range beyond the number we set from the first step. In Maya's Graph Editor panel (Image D) go to Curves>Pre Infinity>Cycle (repeat the same thing for Post Infinity also). This process applies to any 3D package you might be using, the cycling tool itself might might has a different name but the idea of this step is to create cycle before and after those 23 frames we have got for the legs.
Step 5: Since we've done some offsetting to the blue legs in the previous step, now we have some dead spaces (not the game) before the starting frame of the blue legs (frame 12 in my example) and also the initial playback range (23 frames in this tutorial) couldn't cover all of the animation. Now we're going to apply 'cycles' to the animation curves so we can expand the playback range beyond the number we set from the first step. In Maya's Graph Editor panel (Image D) go to Curves>Pre Infinity>Cycle (repeat the same thing for Post Infinity also). This process applies to any 3D package you might be using, the cycling tool itself might might has a different name but the idea of this step is to create cycle before and after those 23 frames we have got for the legs.

(Image D) Make animation cycle for animated parts
Step 6: (Image E) The last (but not least) things to do are to animate the body, secondary parts such as the Pedipalp (the 2 small sensing organs which looked pretty much like it's 5th pair of legs), hip, ..., etc. according to the movements of the legs. (follow your cycle's frame range and don't forget to apply cycle to all the parts being animated in this step too). After you've got the cycle going for the whole body, it's time to finalize (refine) everything. Offset the legs in the same color set so they don't lift and land on the exact same frame as the others, you might as well add some styles to the walk based on your preference or goal. (cartoony, robotic, ..., etc.)
Step 6: (Image E) The last (but not least) things to do are to animate the body, secondary parts such as the Pedipalp (the 2 small sensing organs which looked pretty much like it's 5th pair of legs), hip, ..., etc. according to the movements of the legs. (follow your cycle's frame range and don't forget to apply cycle to all the parts being animated in this step too). After you've got the cycle going for the whole body, it's time to finalize (refine) everything. Offset the legs in the same color set so they don't lift and land on the exact same frame as the others, you might as well add some styles to the walk based on your preference or goal. (cartoony, robotic, ..., etc.)

(Image E) Animate body + offset animations
So here we are, simple spider walk cycle + minor secondary animations and offsets. Note that the last step is very important. You should setup the key frames and base animations from step 1-5 efficiently so that you can spend more time and effort finalizing the look of the whole thing. Too bad this rig doesn't have advanced control option for the more complicated animations (especially the tips of the legs) but it worked really fine for the purpose of this tutorial.

2. Made-up insect walk
While the actual spider walk looks mechanical and menacing, I also like to animate spiders in my own way. I call this walk cycle 'made-up insect walk' because it's similar to the way some insects walk (think Centipede), the reason I used the term 'made-up' because I just came up with this style purely from my imagination.
- Follow step 1 and step 2 from the actual spider walk above.
-
Step 3b: Instead of separate the legs into 2 major moving group, I assigned numbers which define the sequence of all 8 legs (1 means that leg move first and 8 means that one is the last one to go)
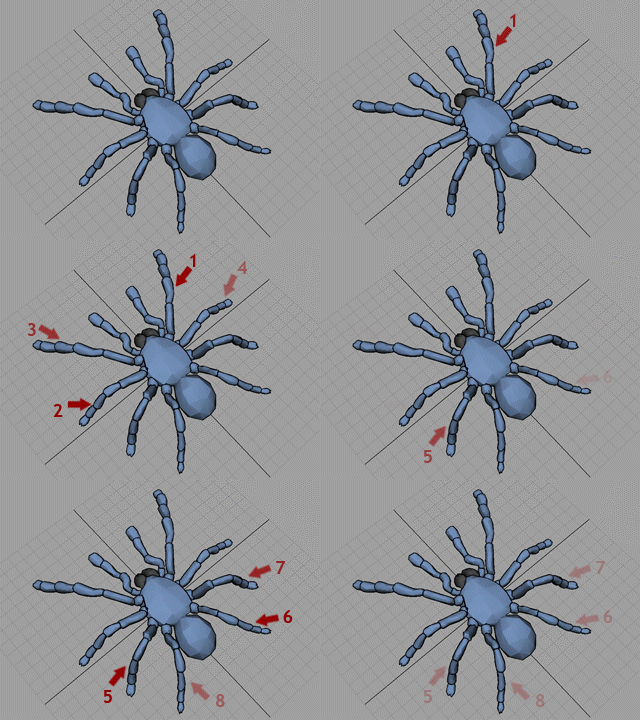
- Step4b: Instead of offsetting the entire set of the 'blue legs', we will offset them sequentially as defined in the previous step. They do not have to be spaced evenly from each other, just adjust the timing to your liking.
- Step 5: Create cycles (pre and post infiniity) for the animation curves.
- Step 6: Animate body according to the movements of the legs. Do some offsettings and add some secondary animations.

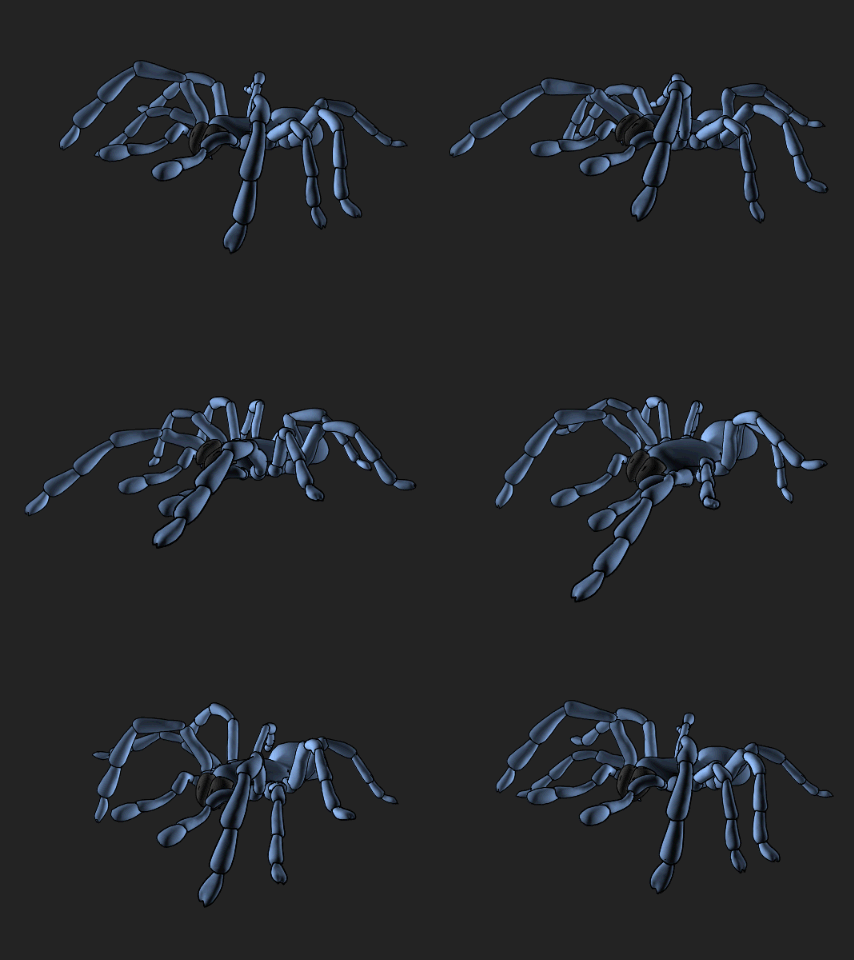
Here it is, my made-up insect walk cycle for spider
Think I'm going to end this article here, hope I made it easy enough to understand. Critiques and comments are very welcomed. Cheers!
Page 1 of 1
Author: Sitthichok Khunthaveelab
Submitted: 2011-02-02 21:40:17 UTC
Tags: spider animation, maya, and animation tutorial
Software: Maya
Views: 44,620
Related Items
-
BitCake Exporter - a Game Animation plugin 1.1.0 for Maya (maya script)
$20.00 (USD) -
Spider-man 3D Model
$79.00 (USD) -
Spider Tank 3D Model
$55.00 (USD) -
Animated Olympic Fire 2014 (Maya) 3D Model
$69.00 (USD) -
Elephant 3d textured model 3ds max and maya scene files 3D Model
$30.00 (USD) -
Meerkat Maya Rig 0.0.1 for Maya
$75.00 (USD) -
3D Silver Cyborg Maya Rig 0.0.1 for Maya
$200.00 (USD) -
Nick-Maya Rig With Advance Facial Setup for Maya 0.1.0
$20.00 (USD) -
Pamela Maya (2013) Rig for Maya 0.0.1
$20.00 (USD)


