1. Overview
This tutorial walks through the process of creating caustic effects in Autodesk Maya 2014 x64, using advanced shader techniques. It will be most useful to artists who already know some Maya basics: modeling, assigning materials, using the Channel Box, Attribute Editor (CTRL + A), Hypershade Window (Window > Hypershade: Hierarchy), and performing rendering operations (Render Current Frame, Batch Render, IPR, etc.)
Two key shaders we will be using for caustic effects:
-
“parti_volume”—this will be attached both to the shape that defines the volume for all caustic effect calculations, as well as the camera that will see them for rendering
-
“parti_volume_photon”—defines which surfaces will dissipate volume caustic photons into the calculation volume when struck by reflected and refracted caustic photons
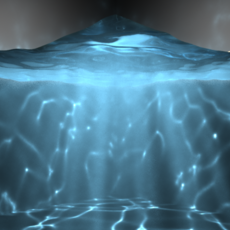
Basic process for caustics effects: cast virtual photons from a light into a volume with (a) “parti_volume” shader assigned to it to define the photon boundary for the effect. Photons cast from that light will be refracted or reflected by (b) semi-transparent surfaces that have raytrace refractions enabled (which in this case is also deformed with an ocean shader for the water look), casting refractive and reflective caustics onto scene geometry. That same semi-transparent surface can also dissipate volume caustic photons if it also has (c) a mental ray “parti_volume_photon” shader attached. (NOTE: If you would like a light to cast volume caustics into the area above the water [i.e: for dust/light fog in the environment], you would have to put another plane directly in front of the light source to generate these photons). Caustic photons are then caught by (d) a "potonBoundary" geometry (a cube primitive with inside-out normals works fine) which has a reference to the "parti_volume" shader, then rendered by the mental ray renderer though (e) a camera that also has a reference to the same “parti_volume” shader.
Final render — video
To give credit where credit is due, the main motivation for this tutorial was the realization that volume shaders are not very well documented anywhere, and it was a real struggle to find tutorials online. I found the process so frustrating that I wanted to try and make it easier for the next poor sap that wants to make caustic effects. As a result, I cobbled this tutorial together using various others I found online, then did some rigorous testing, pulling apart different elements until I pared the process down to its core fundamentals. Tutorials I drew data from include:
-
Underwater lighting - parti_volume by Callum Ridley
-
Volume Caustics in Autodesk Maya 2013 by Samuel Liles
-
Let's make Volumetric Caustics in Maya! - Free Tutorial Weekly by Escape Studios
Author: david allen
Submitted: 2014-05-14 18:18:06 UTC
Tags: coustics, maya, refractive, reflective, and volumetric
Software: Maya
Views: 58,954
Related Items
-
Animated Olympic Fire 2014 (Maya) 3D Model
$69.00 (USD) -
Elephant 3d textured model 3ds max and maya scene files 3D Model
$30.00 (USD) -
1-Click Texture Batch Bake for Maya for Maya 1.0.0 (maya script)
$20.00 (USD) -
"Rapid Rig: Poser" for Maya for Maya 2.0.9 (maya script)
$20.00 (USD) -
Nick-Maya Rig With Advance Facial Setup for Maya 0.1.0
$20.00 (USD) -
Pamela Maya (2013) Rig for Maya 0.0.1
$20.00 (USD) -
The Alchemy Tools for Maya for Maya 1.0.0 (maya script)
$20.00 (USD) -
Arab Rig for Maya with Ncloth simulation for Maya 0.0.1
$99.00 (USD) -
Poly Tools for Maya for Maya 0.4.2 (maya script)
$20.00 (USD)


